1、简述
Spring Boot Admin可以监控Spring Boot单机或集群项目,它提供了详细的健康(Health)信息、内存信息、JVM系统和环境属性、垃圾回收信息、日志设置和查看、定时任务查看、Spring Boot缓存查看和管理等功能。
Spring Boot Admin分为server端和client端。server端可以查看各个微服务的状态,client端则将微服务注册到server端。它利用spring-boot-starter-actuator提供的功能,将各个微服务的状态整合到一起,并提供良好的界面查看支持,同时能够动态地修改实例日志级别。
GitHub地址:https://github.com/codecentric/spring-boot-admin
本文将介绍如何在 Spring Boot 项目中集成 Spring Boot Admin,并探讨其主要优点以及提供一些示例。

2、环境准备
在开始之前,确保你已经安装了以下环境:
🔹 JDK 8 或更高版本
🔹 Maven 或 Gradle
🔹 一个 Spring Boot 项目
3、Admin Server
3.1 引入依赖
首先,在你的 Spring Boot 项目的 pom.xml 文件中添加 Spring Boot Admin Server 的依赖:
<?xml version="1.0" encoding="UTF-8"?>
<project xmlns="http://maven.apache.org/POM/4.0.0" xmlns:xsi="http://www.w3.org/2001/XMLSchema-instance"
         xsi:schemaLocation="http://maven.apache.org/POM/4.0.0 https://maven.apache.org/xsd/maven-4.0.0.xsd">
    <modelVersion>4.0.0</modelVersion>
    <parent>
        <groupId>org.springframework.boot</groupId>
        <artifactId>spring-boot-starter-parent</artifactId>
        <version>3.3.0</version>
        <relativePath/> <!-- lookup parent from repository -->
    </parent>
    <groupId>com.example</groupId>
    <artifactId>springbootadmin</artifactId>
    <version>0.0.1-SNAPSHOT</version>
    <name>springbootadmin</name>
    <description>springbootadmin</description>
    <properties>
        <java.version>21</java.version>
        <admin.starter.client.version>3.3.0</admin.starter.client.version>
    </properties>
    <dependencies>
        <dependency>
            <groupId>org.springframework.boot</groupId>
            <artifactId>spring-boot-starter</artifactId>
        </dependency>
        <dependency>
            <groupId>org.springframework.boot</groupId>
            <artifactId>spring-boot-starter-web</artifactId>
        </dependency>
        <dependency>
            <groupId>org.springframework.boot</groupId>
            <artifactId>spring-boot-starter-test</artifactId>
            <scope>test</scope>
        </dependency>
        <dependency>
            <groupId>de.codecentric</groupId>
            <artifactId>spring-boot-admin-server</artifactId>
            <version>${admin.starter.client.version}</version>
        </dependency>
        <dependency>
            <groupId>de.codecentric</groupId>
            <artifactId>spring-boot-admin-server-ui</artifactId>
            <version>${admin.starter.client.version}</version>
        </dependency>
<!--        <dependency>-->
<!--            <groupId>org.springframework.boot</groupId>-->
<!--            <artifactId>spring-boot-starter-security</artifactId>-->
<!--        </dependency>-->
    </dependencies>

    <build>
        <plugins>
            <plugin>
                <groupId>org.springframework.boot</groupId>
                <artifactId>spring-boot-maven-plugin</artifactId>
            </plugin>
        </plugins>
    </build>

</project>
可以结合Spring security 来实现登录鉴权,实现密码登录,在 application.properties 配置:
# 如果启用了Spring Security,还需要配置用户名和密码
#spring.security.user.name=admin
#spring.security.user.password=admin
3.2 配置
在你的 Spring Boot 项目中,创建一个新的 Spring Boot 应用作为 Admin Server。创建一个新的类并加上 @EnableAdminServer 注解:
package com.example.springbootadmin;

import de.codecentric.boot.admin.server.config.EnableAdminServer;
import org.springframework.boot.SpringApplication;
import org.springframework.boot.autoconfigure.SpringBootApplication;

@EnableAdminServer
@SpringBootApplication
public class SpringbootadminApplication {

    public static void main(String[] args) {
        SpringApplication.run(SpringbootadminApplication.class, args);
    }

}
在 application.properties 或 application.yml 文件中添加 Admin Server 的配置:
server.port=8080
spring.application.name=springbootadmin
management.endpoint.health.show-details=always
4、Admin Client
首先,在你的 Spring Boot 项目的 pom.xml 文件中添加 Spring Boot Admin Client 的依赖:
<?xml version="1.0" encoding="UTF-8"?>
<project xmlns="http://maven.apache.org/POM/4.0.0" xmlns:xsi="http://www.w3.org/2001/XMLSchema-instance"
         xsi:schemaLocation="http://maven.apache.org/POM/4.0.0 https://maven.apache.org/xsd/maven-4.0.0.xsd">
    <modelVersion>4.0.0</modelVersion>
    <parent>
        <groupId>org.springframework.boot</groupId>
        <artifactId>spring-boot-starter-parent</artifactId>
        <version>3.3.0</version>
        <relativePath/> <!-- lookup parent from repository -->
    </parent>
    <groupId>com.example</groupId>
    <artifactId>springbootclient</artifactId>
    <version>0.0.1-SNAPSHOT</version>
    <name>springbootclient</name>
    <description>springbootclient</description>
    <properties>
        <java.version>21</java.version>
        <admin.starter.client.version>3.3.0</admin.starter.client.version>
    </properties>
    <dependencies>
        <dependency>
            <groupId>org.springframework.boot</groupId>
            <artifactId>spring-boot-starter</artifactId>
        </dependency>
        <dependency>
            <groupId>org.springframework.boot</groupId>
            <artifactId>spring-boot-starter-web</artifactId>
        </dependency>
        <dependency>
            <groupId>org.springframework.boot</groupId>
            <artifactId>spring-boot-starter-test</artifactId>
            <scope>test</scope>
        </dependency>
        <dependency>
            <groupId>de.codecentric</groupId>
            <artifactId>spring-boot-admin-starter-client</artifactId>
            <version>${admin.starter.client.version}</version>
        </dependency>
        <!-- spring-boot-actuator -->
        <dependency>
            <groupId>org.springframework.boot</groupId>
            <artifactId>spring-boot-starter-actuator</artifactId>
        </dependency>
    </dependencies>

    <build>
        <plugins>
            <plugin>
                <groupId>org.springframework.boot</groupId>
                <artifactId>spring-boot-maven-plugin</artifactId>
            </plugin>
        </plugins>
    </build>

</project>
在 application.properties 或 application.yml 文件中添加 Admin Client 的配置:
server.port=8182
spring.application.name=springbootclient
spring.boot.admin.client.url=http://localhost:8080
management.endpoints.web.exposure.include=*
management.endpoint.health.show-details=always
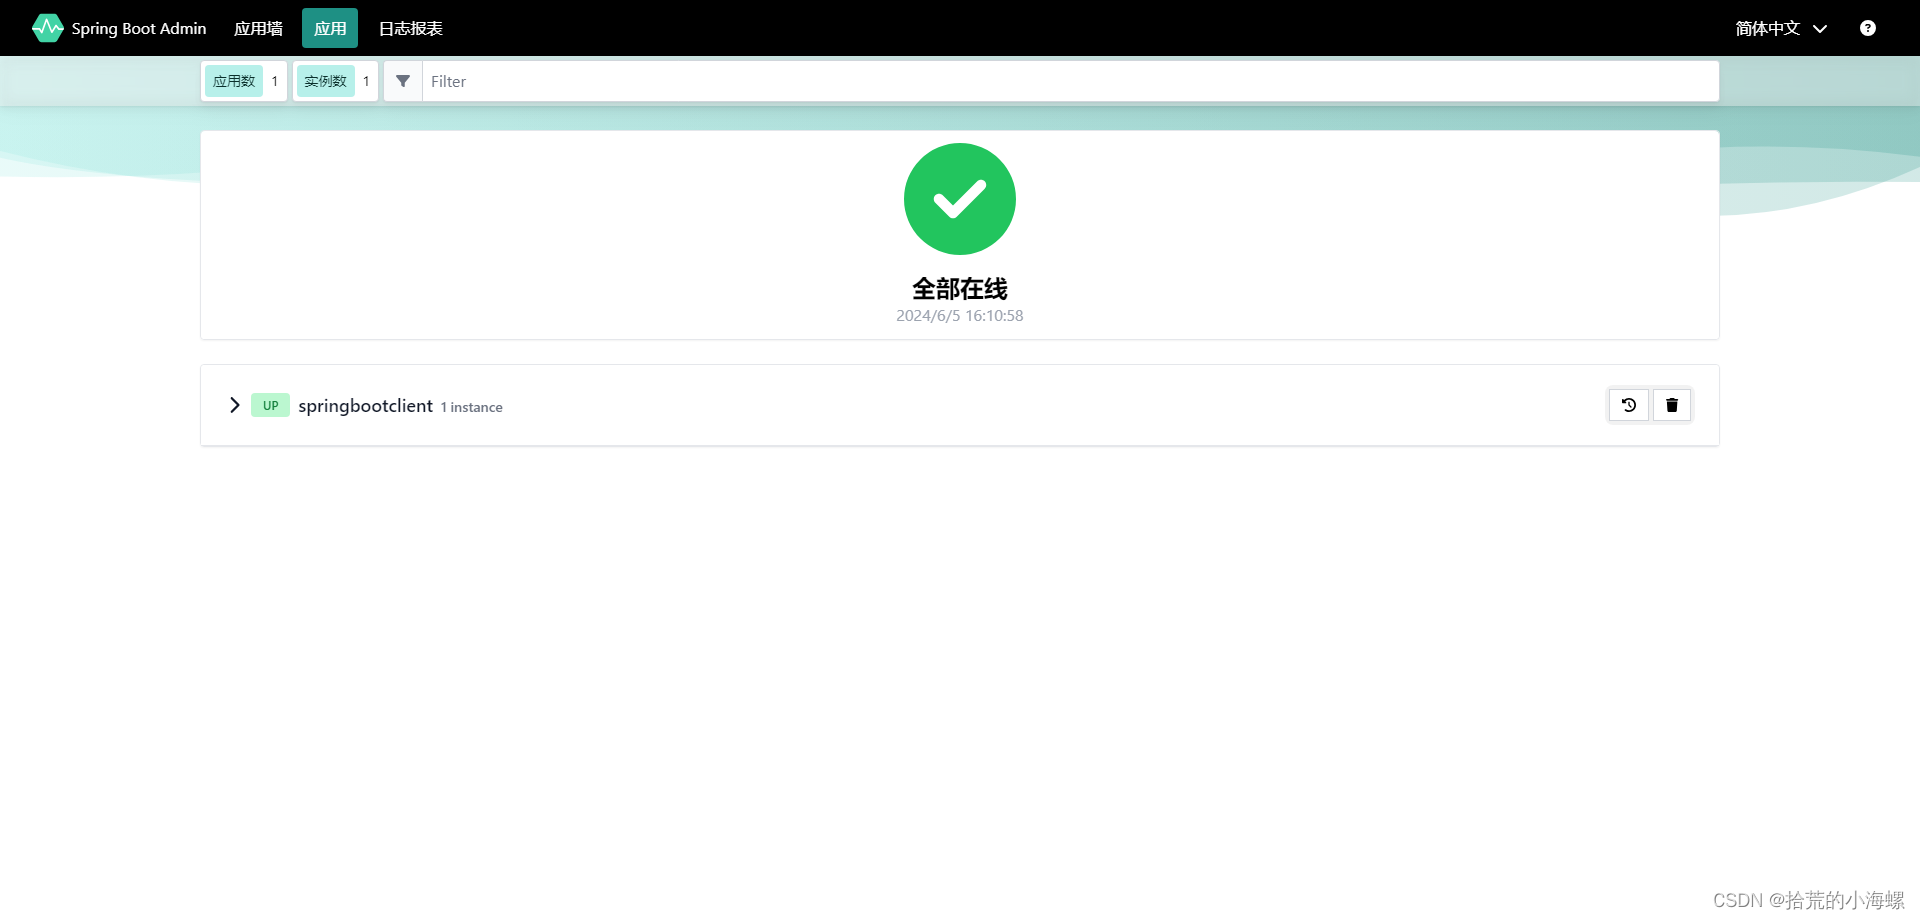
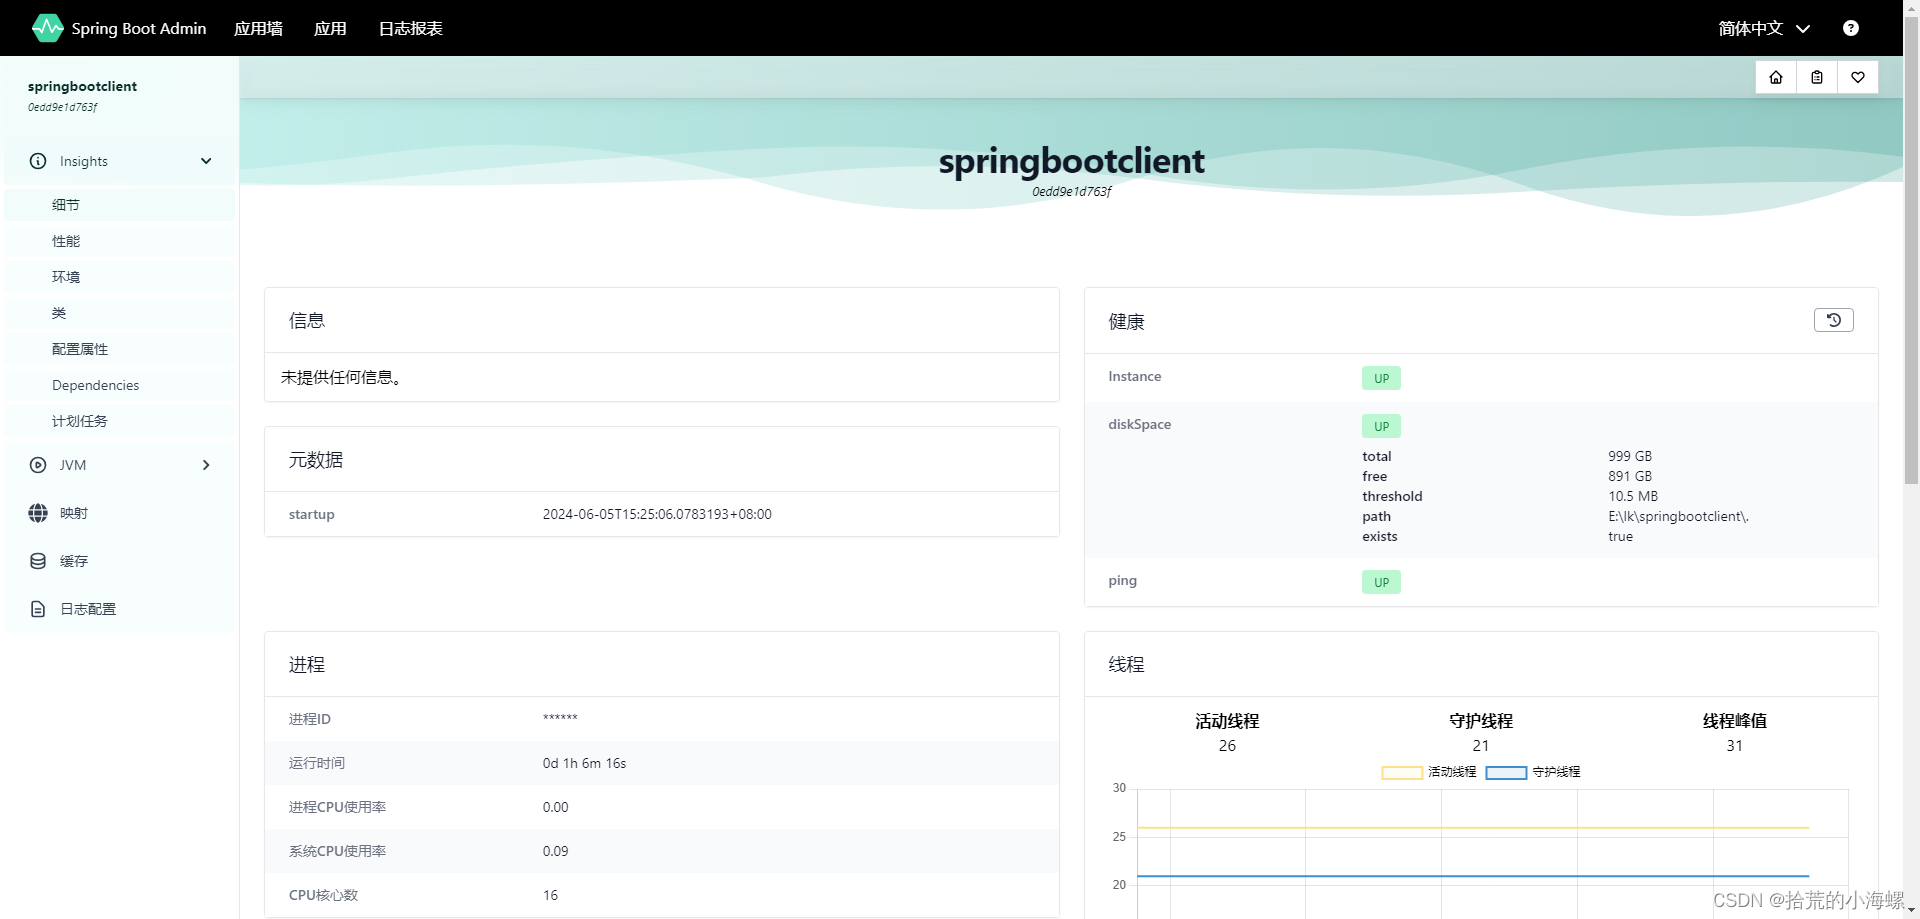
启动Admin Server 和 Client ,实现微服务注册和日志报表:

5、Spring Boot Admin 的优点
Spring Boot Admin UI部分使用AngularJs将数据展示在前端,是一个针对Spring Boot的actuator接口进行UI美化封装的监控工具。
🔹 实时监控:可以实时监控应用程序的健康状况、内存使用、线程信息等。
🔹 丰富的功能:提供了如日志查看、环境变量查看、JMX Beans 浏览、HTTP 路径测试等功能。
🔹 易于集成:通过简单的配置即可集成到 Spring Boot 项目中。
🔹 用户友好界面:提供一个友好的 Web 界面,方便运维人员和开发人员使用。
🔹 通知支持:支持通过邮件、Slack、HipChat 等方式发送通知。

在开发过程中可以结合Eureka、Consul、Nacos等注册中心相结合,自动扫描注册到注册中心上的所有服务,只要服务中集成了 Spring Actuator。
6、总结
Spring Boot Admin 提供了一个强大而易用的解决方案来管理和监控 Spring Boot 应用程序。通过简单的配置,即可实时监控应用的健康状况,查看日志信息,极大地方便了开发和运维工作。
希望通过本文,你能够顺利地在你的 Spring Boot 项目中集成 Spring Boot Admin,并享受到它带来的便利。

